
Home»eSIM»Install eSIM on iPhone
How to Install an eSIM on iPhone (Step by Step, With the Gotchas)
By  Ignas Simkus|Last updated: 22 July 2026|How we test
Installing a travel eSIM on an iPhone takes about five minutes, and almost every failed install comes down to one of four checks people skip. Do the checks, then the install, in that order. This is the exact routine I run before every flight, and it has not failed me yet. Here is the whole thing.
Article Summary
- Check first: iPhone XS or newer, carrier-unlocked
- Install: in the provider’s app, or scan the QR code under Settings
- Before you fly: install on home wifi, label the line, leave it off
- On landing: turn the line on, set it as your data line, switch data roaming on
Before anything: the four checks
First, your iPhone needs to support eSIM at all. Every model from the iPhone XS and XR onward does; anything older does not, full stop. Apple keeps the definitive list on its Dual SIM support page.
Second, the phone must be carrier-unlocked. A phone still locked to a contract carrier will refuse any foreign eSIM profile. Check under Settings, General, About: scroll to Carrier Lock. It should say “No SIM restrictions”. If it says anything else, ask your carrier to unlock it before the trip, which can take a few days.
Third, know which iPhone variant you have. US iPhone 14 models and later have no physical SIM tray at all, so your home number already lives on an eSIM. That changes nothing about the install, but it means your home line and travel line will both be eSIMs, and the labelling step below matters more.
Fourth, if your iPhone came from mainland China, it likely has no eSIM support regardless of model. That is a hardware variant issue, not a settings one.
Installing: app method or QR method
Most travel eSIM providers now install directly from their own app, and it is the better route: the app pushes the profile to the phone with no QR scanning, and your plan, top-ups and support all live in the same place. Buy the plan, tap install, approve the iOS prompt, done.
The QR method is the fallback. The provider emails you a QR code; go to Settings, Cellular (newer iOS names it Mobile Service), Add eSIM, then Use QR Code, and point the camera at the code on another screen or a printout. Two shortcuts worth knowing: the Camera app can scan the code directly, then offers a “Mobile Plan” tap-through, and on iOS 17.4 or later you can simply long-press the QR image in the email and choose Add eSIM from the pop-up, no second screen needed. If you only have the code as text, choose Enter Details Manually and type the SM-DP+ address and activation code from the email.
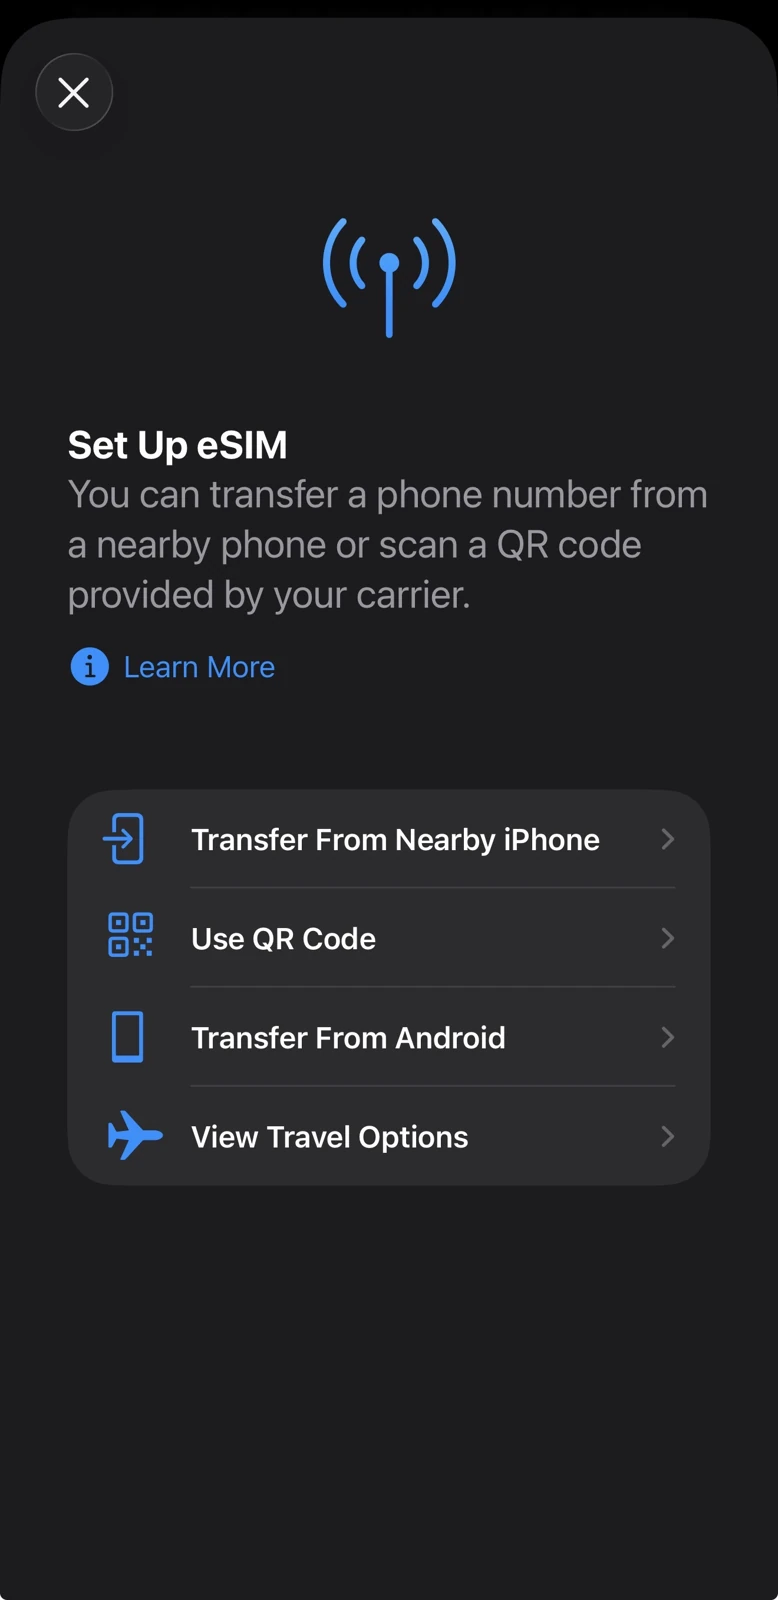
One code, one install. Most travel eSIM QR codes are single-use. Once the profile is on a phone, that same code will not install it again on another device. Install it on the phone you are actually taking.
The settings that make it work abroad
Installation is half the job. Three settings decide whether you actually get data when you land.
Label the lines. iOS will ask you to name the new line. Call it something unambiguous like “Travel data”. When two lines are both called “Secondary”, the next step goes wrong more often than you would think.
Set the travel eSIM as your data line, on landing. Under Settings, Cellular, Cellular Data, pick the travel line. Keep your home line switched on if you want to receive calls and texts (bank verification codes arrive by SMS, and those come to your home number), but be aware your home carrier may charge roaming rates for received calls.
Turn data roaming on for the travel line. This is the one that catches everyone. A travel eSIM is technically roaming, so with roaming off it sits on “No Service” forever. It is the first fix in our eSIM troubleshooting checklist, because it is the most common failure by a wide margin.
Install at home, activate on landing
Do the install on your home wifi, the day before you fly, with the travel line switched off. Two reasons. If anything goes wrong, you have time and a working connection to fix it or contact support. And most plans only start their validity clock when the eSIM first connects to a network in the destination, so installing early costs you nothing.
Then the landing routine is thirty seconds: turn the travel line on, set it as the data line, confirm roaming is on, and put the phone in airplane mode for ten seconds to force a fresh network search. If you are new to how any of this works under the hood, our plain-English eSIM explainer covers what an eSIM actually is and why there is nothing physical to lose.
FAQ
Can I delete the eSIM after the trip?
Yes, and you should, once you are sure the trip is over. But never delete it mid-trip to “fix” a problem: most travel profiles cannot be reinstalled from the same code, so deletion turns a fixable glitch into a lost purchase.
Does my home number still work?
Yes. Dual SIM means both lines are live at once. Your home number rings and receives SMS; only your data flows through the travel line.
How many eSIMs can an iPhone hold?
Eight or more stored profiles, with two active at a time, per Apple. Old travel profiles can sit there switched off without harm until you clean them up.
Which eSIM should I actually buy?
That depends on the destination more than the brand. Our travel eSIM rankings explain how the underlying network decides it, and the destination guides, like Japan, go carrier by carrier. On Android instead? The Android install guide covers the Pixel and Samsung differences.
Do I need wifi to install an eSIM on iPhone?
In practice yes: the phone downloads the profile during install. That is the whole reason the golden rule is install at home before flying. Activating abroad afterwards needs nothing beyond toggling the line on.
Why is my eSIM stuck on “Activating”?
Nine times out of ten it is waiting for a network it cannot see yet, which is normal if you installed at home. It resolves itself when you land and the local network answers. If it still hangs after landing, restart the phone and check data roaming is on for that line.
Can I install the same eSIM QR code twice?
Usually no. Most travel eSIM QR codes are single-use, so deleting the profile burns it, and that is the most common self-inflicted support ticket in the category. If you need to reinstall, go through the provider’s app or support first.